A new direction for blogging about ink
Since early 2007 I’ve had a Typepad hosted blog – inkpad.typepad.com – which will be disappear on September 30, 2025 when Typepad closes operations. To date I have 999 posts over there. While it’s truly disappointing after so many years, when you consider that other atrocities people in our country and world are currently experiencing, I guess it’s really just small potatoes. I’ll save what I can and re-introduce some of my favorites here though I’m afraid the original links will be lost.
In a way this kind of jives with where my stamping is heading anyway. I’m starting to refocus on old favorites in my stash and trying to resist trying every new thing. Don’t get me wrong, the new things tempt me but there are SO many older images and tools that I have loved and still want to explore. Let me know if you would like to see more ideas with old favorites too. This is really a practice post for me to get to know WordPress and see how this will all come together. Here is my very first blog post from January 3 2007: … and then a little more chatter
JANUARY 03, 2007
Bib Blossom WOW swap
Some hints: I used my brayer to apply Ruby Red ink evenly to the blossom stamp. You can’t see it but I stamped “happy joyful birthday” from Small Sayings inside the card in Very Vanilla craft ink. When the card is closed the message is hidden by the petal. I’m really efficient at the dots around the petals now that I’ve made 38 cards to swap with WOWswappers, a monthly swap group I’ve been in for several years.
I knew Big Blossom was going to be fun almost as soon as I saw it. This is a card that was developing in my mind while I waited for my demonstrator Sell-a-Bration preorder to arrive.
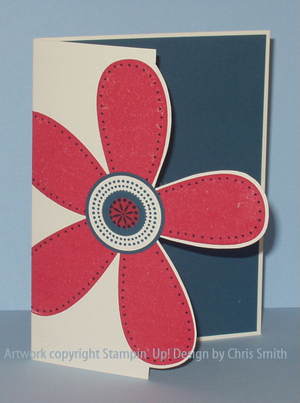
Look how short it was and I even used “Bib” instead of “Big”. What a rookie!
Here are some other Big Blossom cards I posted that first month. It looks like I did have a little fun with it.
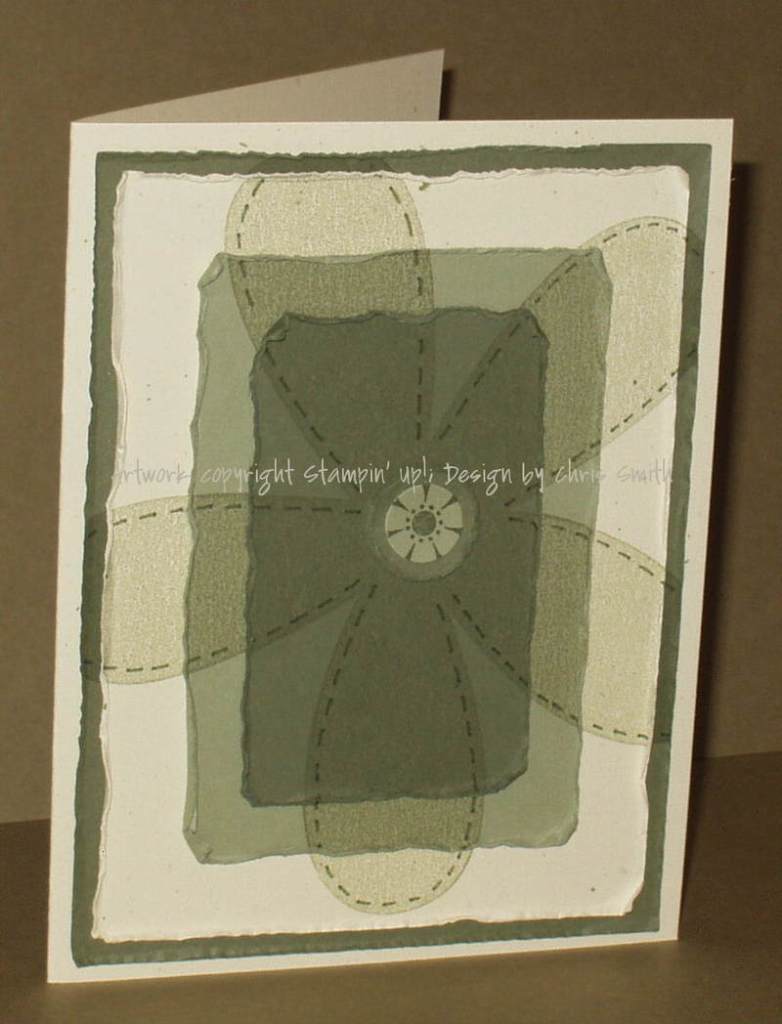
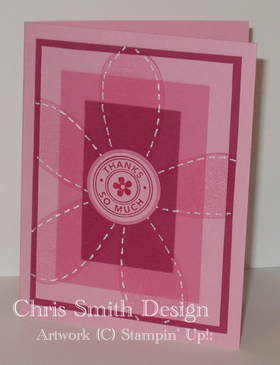

I called the technique I developed for the first two cards Shady Layers. It used some tools that have been discontinued such as the Perfect Layers tool but it’s possible some may still find it helpful so I have converted that post to a PDF file if you would like to see it. I didn’t have the heart to delete the kind comments so be aware. If you choose to print you may want to do select pages.
So what’s on my craft table now?
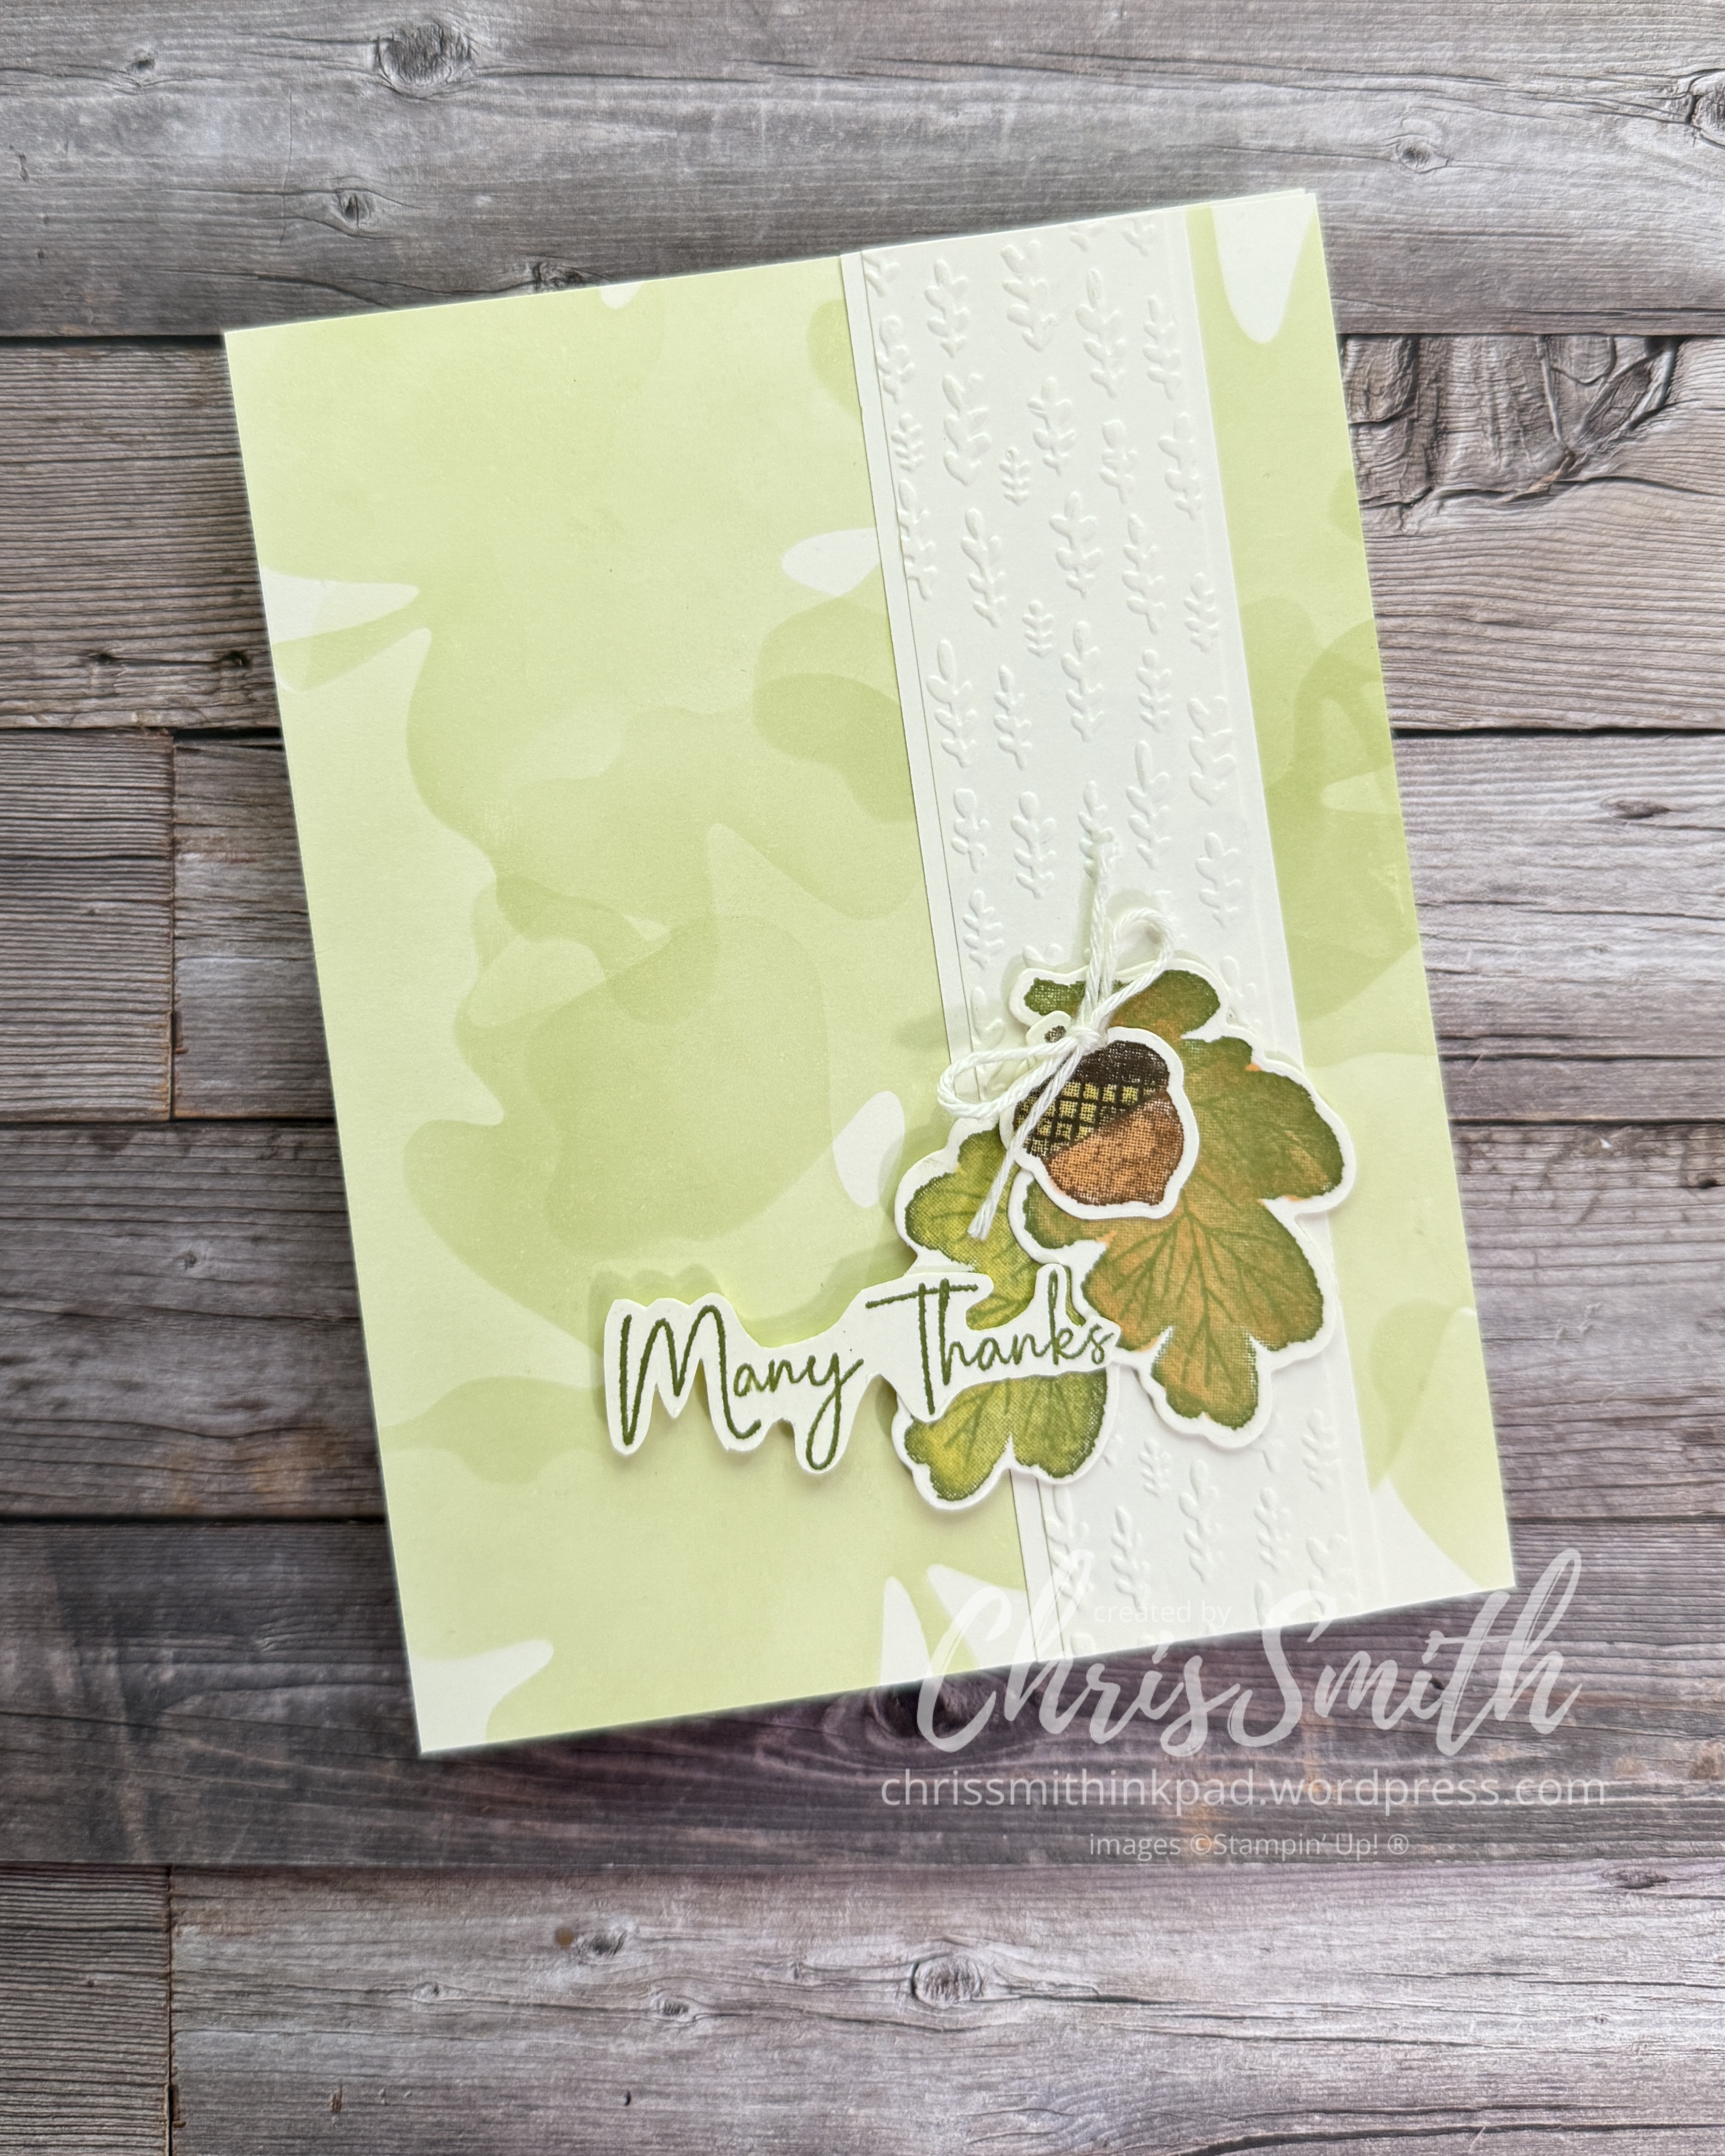
I don’t have any recent work with large background sized stamps to share with you today but I have been playing with some pretty big leaf dies from the Gathering Moments Bundle/Gathering Together Suite.
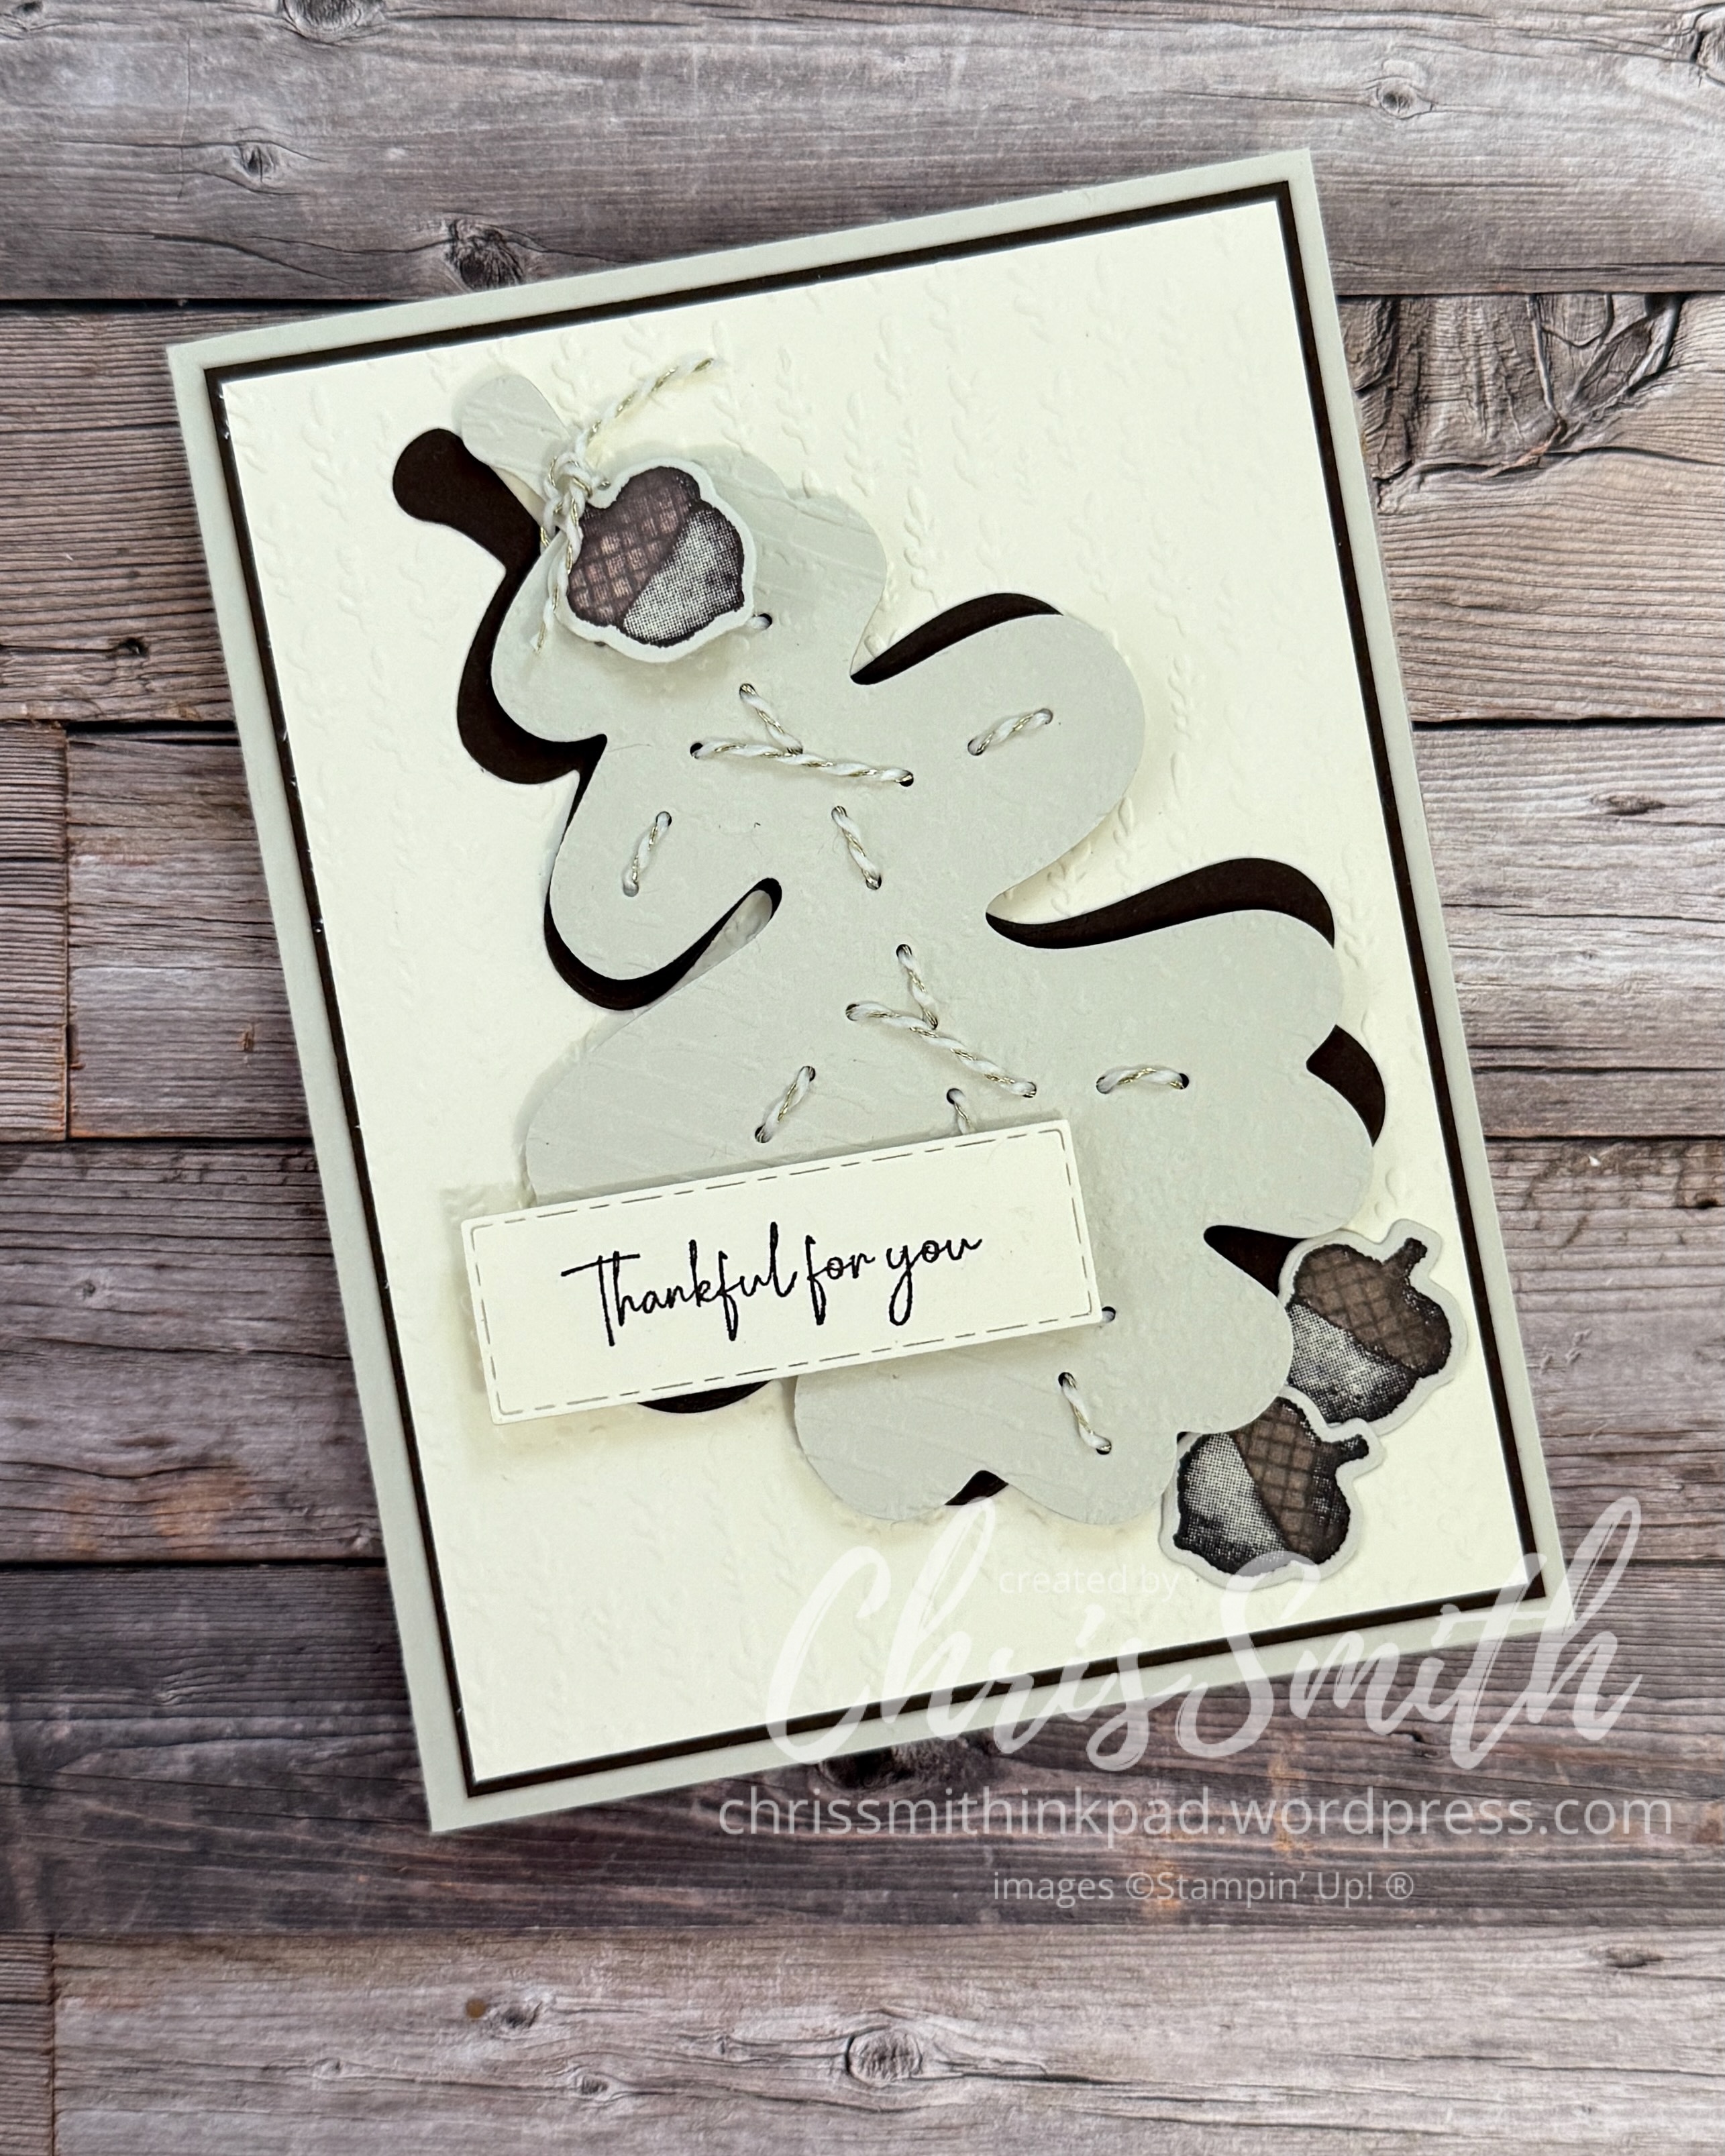

These two cards make use “nesting” dies that include an outline die and another large die with holes that fits into the middle. These holes can be used to make stitches OR just show through to another color.
Or, you can use the outline dies alone. In the next photo I used it with an embossing folder and then blended a bit of Basic Beige ink around the edges. In the second card I used the “negative” of the die cut as a stencil to brush in layers of leaf prints, such as you see when leaves bleed into a city sidewalk.

Let me know if you want to know more about any of these.

Leave a comment